


Altruist
Лечение визга тормозов по версии Pinbike
24.08.2013 в 15:58 (14646 Просмотров)
Tech Tuesday - Silence That Squeaky Disc Brake
[FONT=Arial]Jan 10, 2012
[/FONT]
[FONT=Arial]by Richard Cunningham
Follow Add to Favorites
[/FONT]
[FONT=Arial]
Everyone has had a day when their brakes howl like monkeys and, unless you happen to be a monkey, a persistent howler can take the fun out of a day's ride - or worse, announce your poaching whereabouts to nearby not-so-bike-friendly uniformed forest inhabitants. Before you become angry or incur another's anger again, silence those stoppers with this week's Pinkbike's Tech Tuesday disc brake how-to.
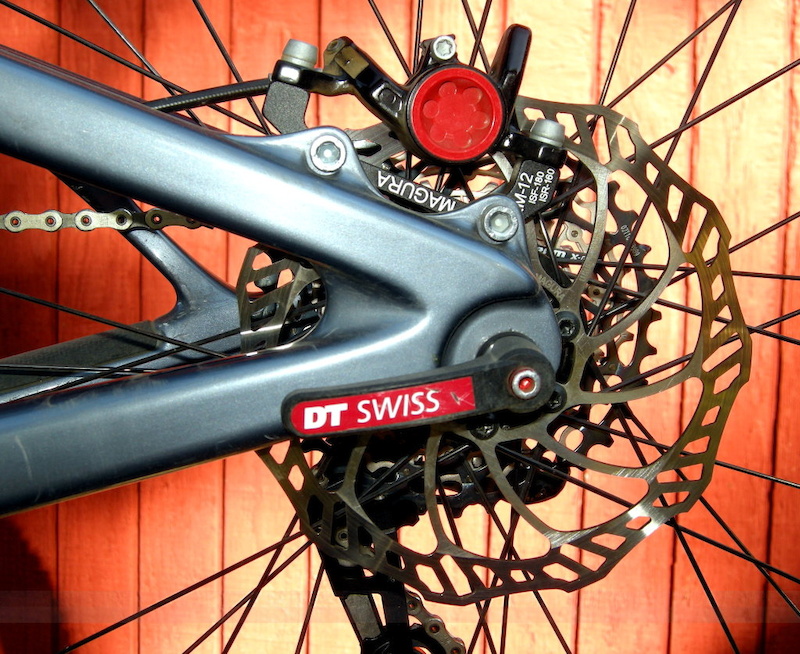
We accidentally lubricated this brake with chain lube and were awarded with a howler on the following ride. It runs silently now - after the Tech Tuesday fix.
Why Disc Brakes Howl
What makes brakes howl was explained to me by Wayne Lumpkin, the founder of Avid Brakes and a vast reservoir of information about everything disc brakes. This is what Wayne said:
As the brakes go through the break-in period, they don't begin to stop with authority until some of the brake pad material is deposited on the rotor as the two components bed together. If the pad cuts through this layer or the layer is laid down irregularly by an improper break-in interval, the pad jumps a tiny bit as it hits a damaged area, digs in, jumps a bit and then digs in again a short distance beyond. The sequence creates an oscillation which continues onward, creating a microscopic series of waves around the circular braking track. Once the pattern is created, the rotor essentially becomes a steel recording disc that is programmed to squeal - and it can't be erased simply by switching to new pads. Brake squeal is most commonly caused by a weak initial break-in period, with the introduction of impurities like chain lube or chemical bike cleaners to the braking surfaces as a close second.
Arrest the Squeal Before it Begins
Wayne says to break in your disc brakes with a series of very firm stops from a reasonably good speed before you get out on the trail. This properly deposits the pad material on the braking surface of the rotors. Typically, most riders drag their brakes lightly around every corner in the trail, as well as down easy descents. Lightly dragging a new set of brakes is a perfect recipe to create brake howl - which is why you see so many cross-country riders with noisy brakes.
Finally, oil your chain by the drop, not with a spray can and save yourself the hassle of cleaning or replacing your noisy rear brake components. Oil on the outside of your links does nothing good for the chain or the bike. Work the lube into the chain slowly and then wipe is squeaky clean before you ride. If you use an aerosol bike polish, then you are guaranteed to get some of the spray on the rotors. Wipe them with automotive brake cleaner on a fresh towel before you spin the wheels.
How to Silence a Squeaky Disc Brake
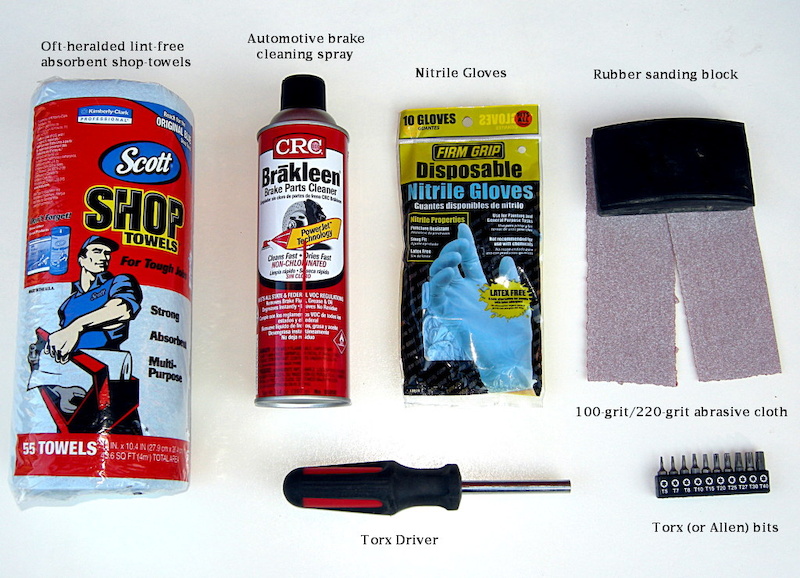
What you need:
Dedicated shop towels are a good idea because aerosol brake cleaner will eat additives and plastics in cloth or paper-type napkins and could cause more trouble. Eye protection is a good idea when using chemicals. We show you the tools necessary to remove Magura brake pads. You'll need a slightly different kit to remove other types of pads. Finally. we used 100-grit abrasive because it gets the job done quickly, but 220-grit will result in a nicer finish. If your rotors use a spider, then make a sanding block from a paint stirring stick or similar, or carefully work the rotor with the edge of the rubber block. Before you get started, realize that brake rotors can become as sharp as a knife on the edges of the braking surfaces and also the connecting spokes. Be careful.
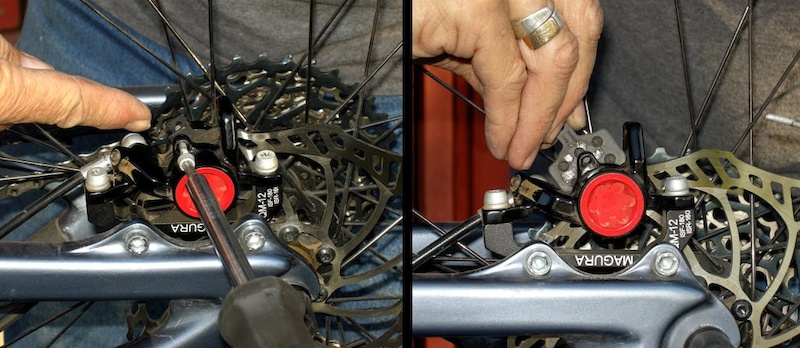
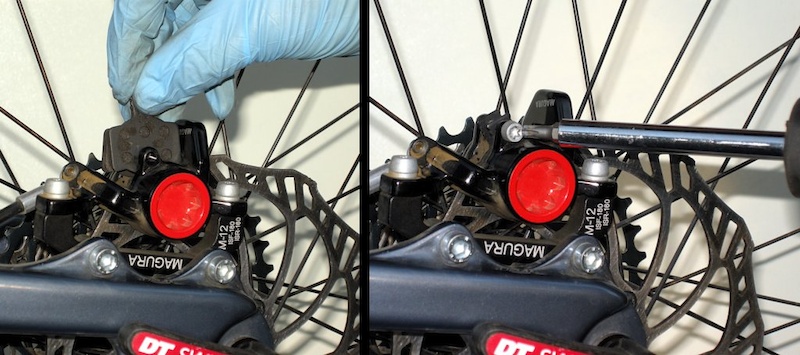
Step 1 - Unscrew the locking pin and slide the brake pads out of the caliper body. Store the pads and pin in a clean and dry place.
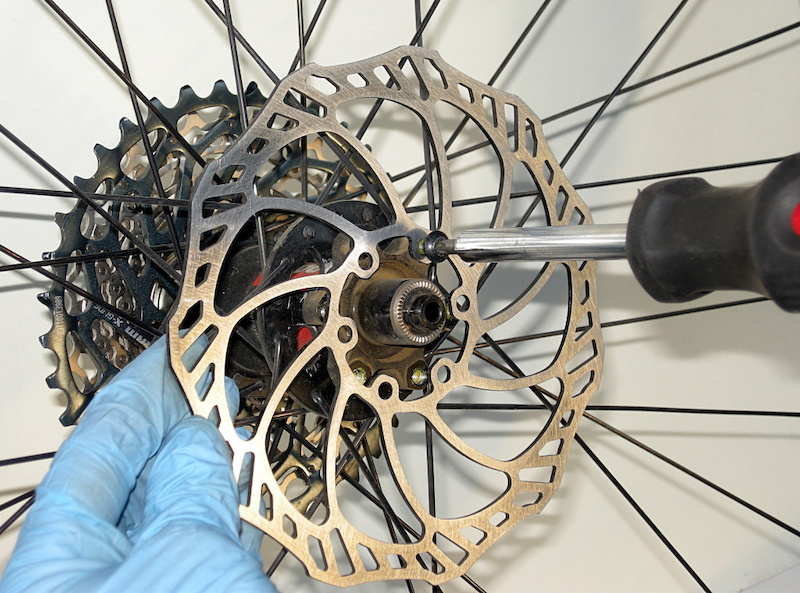
Step 2 - Remove the wheel and unscrew the offending brake rotor. Place the screws in a clean, dry place. They have thread-locking material applied to the threads, so they need to remain grease and oil free.
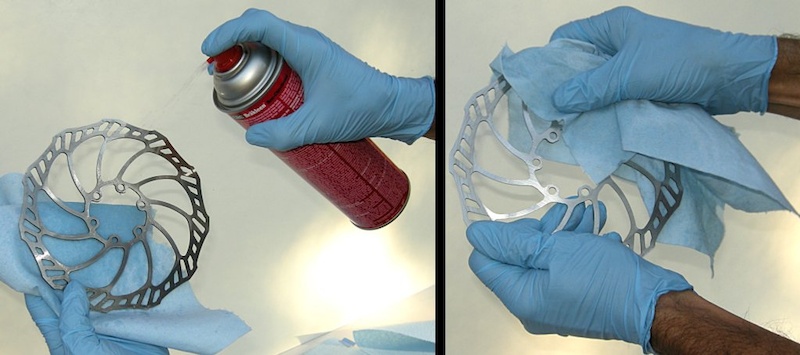
Step 3 - Get the gloves and protective eyewear on. Clean the rotor with a generous dose of automotive brake cleaner and then wipe with a shop towel. Repeat at least once more.
NOTE: The edges of brake rotors can become VERY sharp. Proceed with caution!
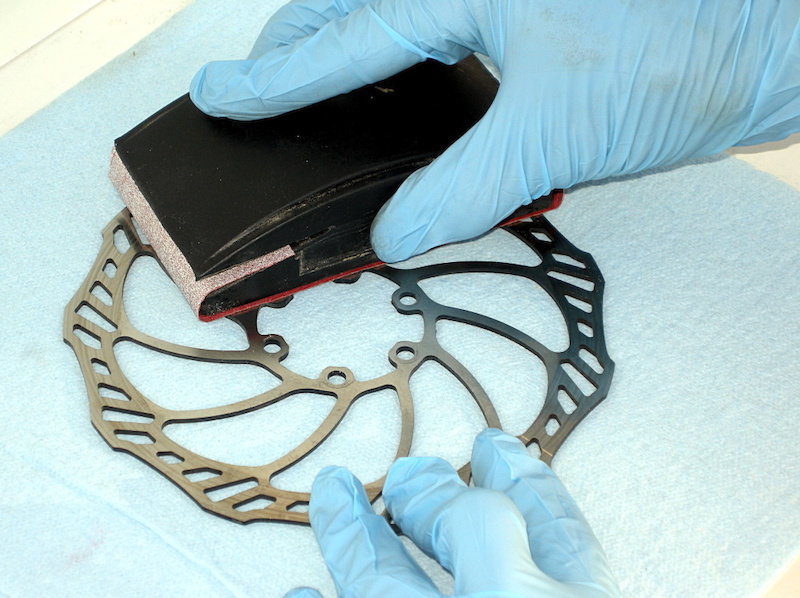
Step 4 - Assemble the abrasive cloth onto the sanding block. Make sure that one edge is virgin so you can work around two-piece rotors with narrow braking tracks.
Step 5 - Place the rotor on a flat table and protect it with a clean shop towel. Sand the rotor in a circular pattern and overlap the rotor face with the sanding block by two inches or so to keep it flat on the braking surface.
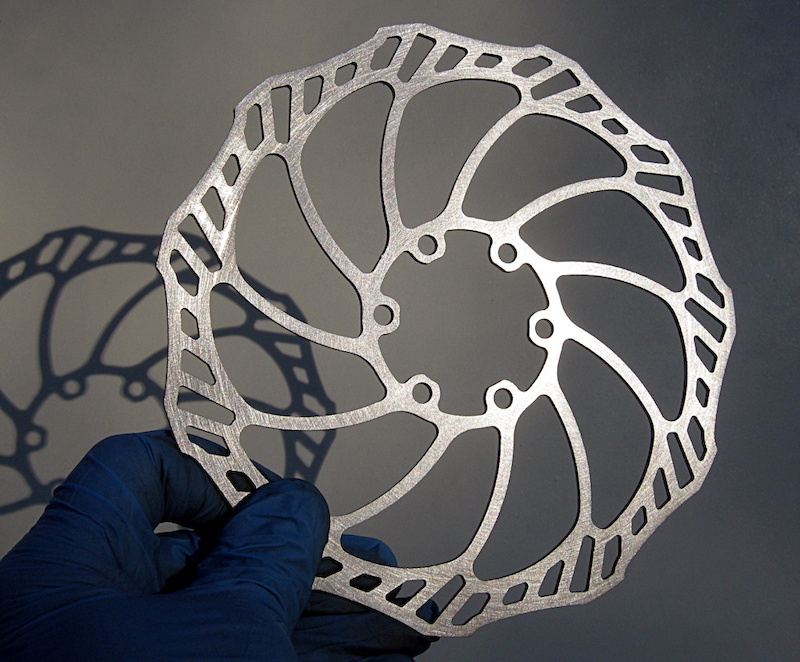
Step 6 - Most or all of the previous braking history should be sanded from both sides of the rotor. Give it a wipe with a clean towel infused with brake cleaning fluid and then set it aside on a clean towel.
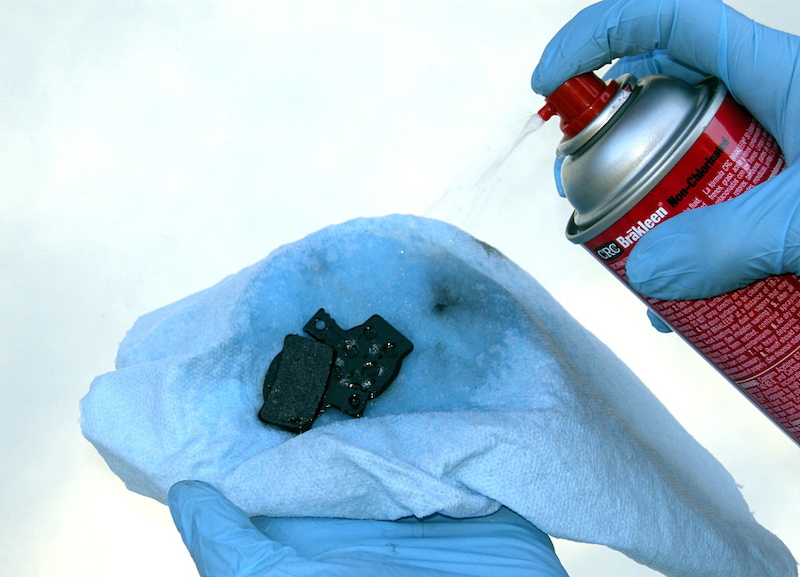
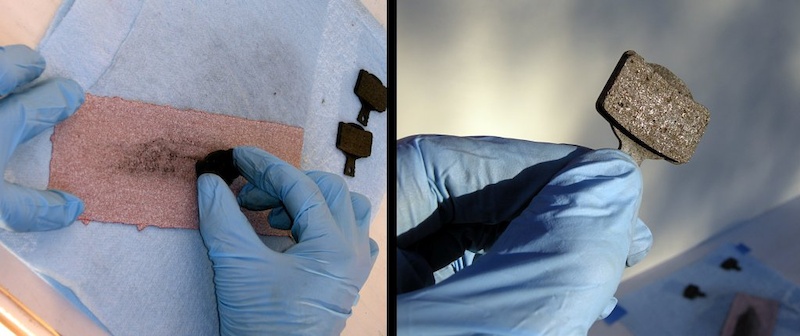
Step 7 - Give the pads a generous spray and then wipe them clean and dry with a towel. Repeat once more and then set them aside in a clean place.
Step 8 - Place a flat section of abrasive cloth on the towel and sand it with light, even pressure - just enough to reveal the grainy matrix of the pad material (right). It doesn't take much to clean it up. Be sure not to overdo this step as over-sanding the pad can distort the braking surface and shorten the pad's life.
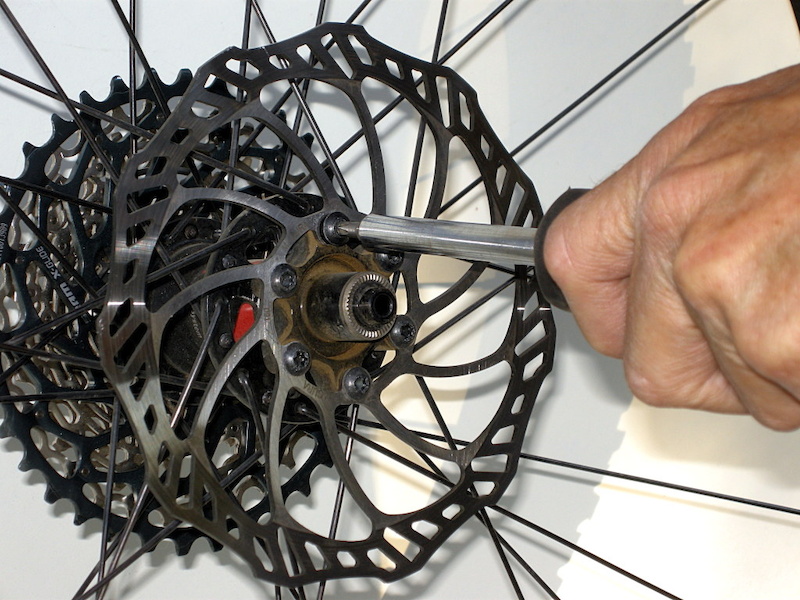
Step 9 - Reassemble the rotor to the hub. Keep your nitrile gloves on for the reassembly process to ensure that you won't be introducing any impurities to the pads or rotor.
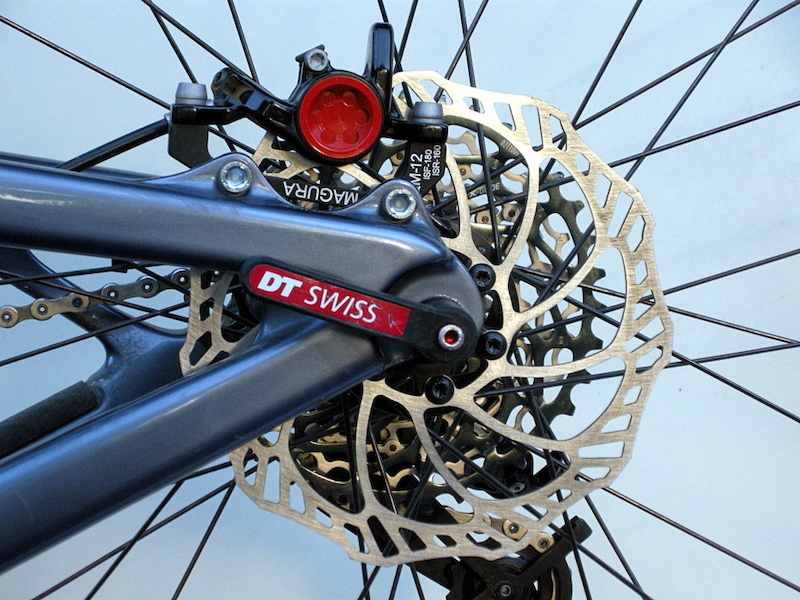
Step 10 - Replace the pads and screw the pad-retainer pin back in using the maker's torque spec.
Step 11 - The finished product awaiting a proper break-in. Burn your brakes in on a paved surface with a dozen strong, controlled stops from 15 to 20 miles an hour.
[/FONT]


- Категории
- Без категории
 Отправить другу ссылку на эту запись
